

Congratulations being named yearbook adviser! You might be wondering where to start on this big but important job and cherished tradition. To get you started, here are ten tips as you embark on this great adventure.
1. PARTNER UP
Find a partner with skills or resources that compliment your own. If you are a teacher, you might want to buddy up with a parent coordinator. If you are a parent, you might want to find a teacher. In either case, you and your partner can divide and conquer tasks like sending reminders, getting class rosters and organizing picture taking. Many yearbooks benefit from having one person with an eye for details and communication and another who loves design and photography.

2. PICTURE DAY
Find out who the school photographer is and reach out to them. Find out the date of picture day and how and when the photographer plans on sharing those photos with you and School Annual. If you are not having a photo day this year due to the pandemic, ask your rep for ideas. We are here to help!
3. THINK BACKWARDS
Work with your rep to ensure that you have a yearbook delivery date that falls at least one and a half weeks before you plan to hand them out. This delivery date will determine your deadline(s). Once you know your deadline(s), establish mini-deadlines that lead up to the big day. A timeline like the following usually leads to a stress-free experience.
5 weeks prior to deadline – decide what topics go on each page and what photos are needed to fill them.
4 weeks prior to deadline – take photos and/or request submissions from teachers and parents.
3 weeks prior to deadline – all photos taken and uploaded into Image Library.
2 weeks prior to deadline – design pages and add photos.
1 week prior to deadline – have a friend proof the yearbook.
4. COVER IDEAS
Choosing a cover is one of the most exciting parts of the yearbook process! Do you want to have a school-wide art contest to create a cover, or will you use one provided by School Annual and personalize it to reflect your school’s name? Maybe you want a specific theme this year or want to create a few and have others vote on their favorite one. You get to decide! Let your rep know as soon as you have a decision.

5. GET A COPY OF LAST YEAR’S YEARBOOK
An old yearbook can give you a good idea of how the yearbook has looked in the past and what school events you should expect to include throughout the year. It is a great jumping point to start brainstorming and planning what should go on each page! If the person who created last year’s book is still associated with the school, you might want to set up a meeting with them. They could help to provide insight on what worked and what they would have done differently.
6. CREATE A PAGE LADDER
A page ladder is a list of each yearbook page and what exactly will be on it. Try to decide how many pages should be for staff, individual classes, and special school events. Completing the ladder in advance allows you to layout your whole book and plan for each page.
7. COLLECT PHOTOS
You can’t create a yearbook without pictures, and getting parents and staff to submit photos is so important! Jostens’ Private Photo Submission allows parents, staff, and teachers to upload images directly into your image library. It’s super easy! Another method would be to use Google Drive and Forms to collect photos.

8. GET SET UP ONLINE
Reach out to your School Annual Account Representative (They are essential in your yearbook creation process)! Your Representative can send you a link to the School Annual Online website with your personal ID and password. From there, log in and familiarize yourself with the website and creation tools.
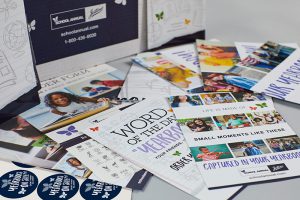
9. CHECK OUT YOUR CREATION KIT
The School Annual Creation kit will arrive at your house or school. Within this box are all the tools that you need to create a fantastic yearbook, including a thick book that will give you all sorts of different cover ideas, clip art, themes, and helpful tips. You will also find tools to help with yearbook sales, collecting money, and creating personalized sales envelopes!
10. HAVE FUN!
Take a deep break and take this one step at a time. Remember your hard work of creating this book of memories will be a fantastic keepsake for children who might not have even seen their classmates all year and will cherish it forever!